Published
- 4 min read
DIY Realism: How to Age and Texture Pots for a High-End Designer Look
DIY Realism: How to Age and Texture Pots for a High-End Designer Look
In the world of high-end interior design, perfection is the enemy of realism. One of the reasons artificial plants often look “fake” isn’t actually the plant—it’s the pot. If a plant is sitting in a perfectly smooth, factory-new, brightly colored plastic or ceramic pot, it looks like a product from a big-box store. Real plants, however, are usually found in pots that show the passage of time: the salt crust of terracotta, the rough texture of stone, or the weathered patina of aged concrete.
As an interior stylist, I often “save” my clients money by buying basic, inexpensive planters from Amazon and then applying custom aging and texturing techniques. These DIY finishes bridge the gap between “synthetic” and “organic,” providing the tactile, weathered look that characterizes luxury designer homes.
In this guide, I will share my top three professional DIY techniques for aging and texturing pots to elevate your artificial plants and make them look indistinguishable from real ones.
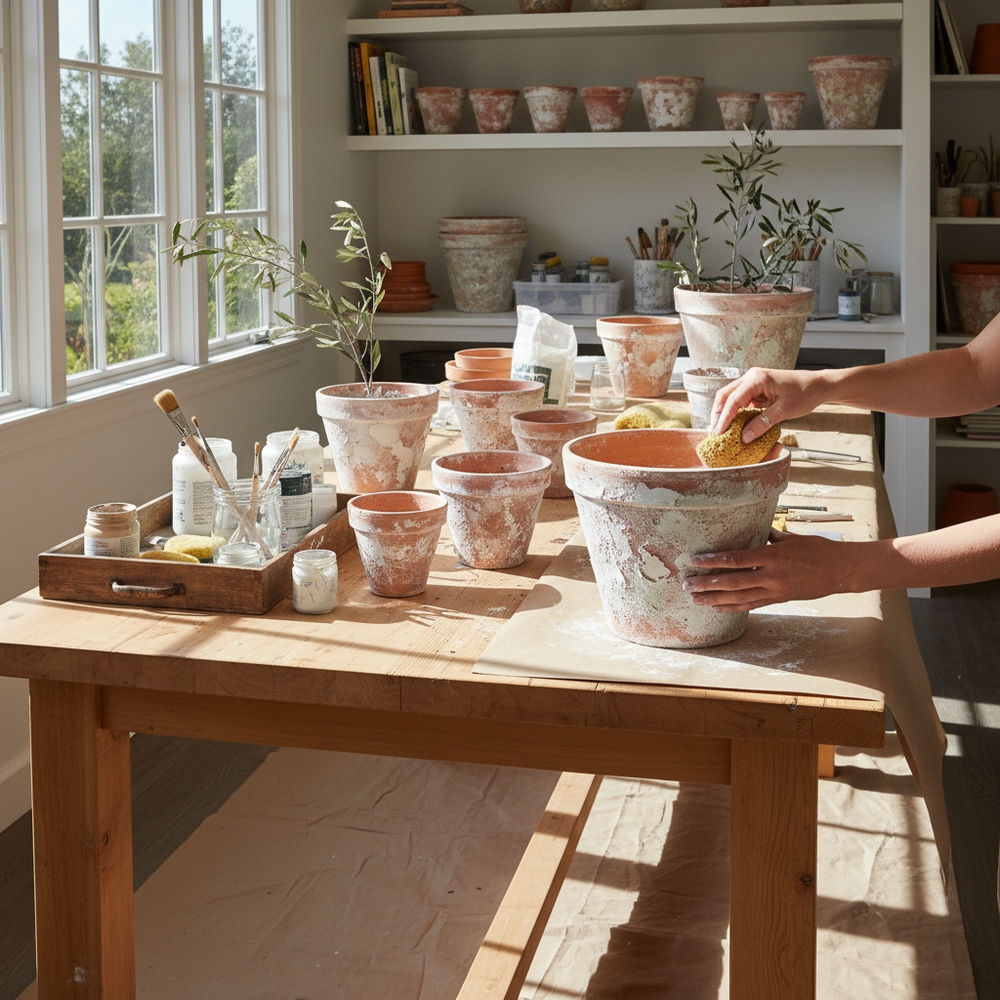
Technique 1: The “European Garden” Terracotta Ageing
Brand new terracotta pots are a bright, garish orange. To make them look like they’ve been in a Mediterranean garden for decades, you need the “Lime-Wash” look.
- The Supplies: A basic terracotta pot, white matte acrylic paint (or hydrated lime), and a coarse sponge.
- The Technique:
- Dilute your white paint with 50% water to create a “wash.”
- Dab the sponge into the wash and lightly blot it onto the pot in irregular sections.
- While the paint is still wet, use a dry cloth to rub some of it away, leaving a chalky, “crusted” appearance.
- Why it works: This mimics the natural salt buildup that happens over years of watering real plants.
- Affiliate Pick: Deroma Set of 3 Standard Terracotta Pots
Technique 2: The “Luxury Concrete” Texture (The Mud-Paint Method)
If you have a smooth plastic or cheap ceramic pot, you can give it the heavy, expensive look of real concrete or stone.
- The Supplies: A smooth pot, matte black or gray paint, and baking soda or fine sand.
- The Technique:
- Mix your paint with a generous amount of baking soda or sand until it has the consistency of thick mud.
- Use a stiff brush to “stipple” (dab) the mixture onto the pot.
- Allow it to dry, then apply a second layer with a slightly lighter shade of gray for depth.
- Why it works: The baking soda creates a rough, granular texture that reflects light exactly like real stone or poured concrete.
Technique 3: The “Antique Bronze” Patina
For an executive or glam look, nothing beats the sophisticated look of weathered metal.
- The Supplies: A basic pot, metallic bronze spray paint, and dark brown wax or “black-wash.”
- The Technique:
- Spray the entire pot with the bronze metallic paint.
- Once dry, apply a very thin layer of dark brown paint (watered down) or furniture wax.
- Immediately wipe most of it away with a cloth, leaving the dark color only in the crevices and low spots.
- Why it works: It creates a “depth” of finish that mimics the oxidation of real metal.
Expert Styling: The “Realism Topper”
Once you’ve aged your pot, you must finish the illusion at the base of the plant.
- For Terracotta: Use Natural Spanish Moss. Its grayish-green color perfectly matches the aged lime finish.
- For Concrete: Use Smooth River Rocks. The contrast between the rough pot and the smooth stones looks very high-end.
- For Bronze: Use Dark Wood Mulch. The deep, organic brown complements the metallic finish.
Conclusion
You don’t need to spend a fortune on designer planters to achieve a high-end look. By using these simple DIY aging and texturing techniques, you can transform basic Amazon pots into custom, architectural masterpieces. These finishes provide the “organic evidence” that sells the illusion of life for your artificial plants. Grab a brush, get creative, and elevate your home’s botanical style today.